How To Rename Git’s Default Branch
Software engineers have increasingly started calling for the industry to update racially-loaded terms such as master and slave, or whitelist and blacklist. Initially, I thought this activism was well-intentioned but kind of missing the mark compared to some of the more immediate crises our society is facing in 2020.
But as I kept working on projects during this summer, seeing the master branch name on all of my git repos started gnawing at me. Every time I had to type something like git push origin master, I stopped to think about how hard it would be to change my own repositories to use a name that was less loaded.
Turns out, it’s pretty easy! Even if you have integrations with your Github repo that depend on watching the master branch, it takes no more than a few minutes to update your defaults everywhere.
Making the change in an existing local repo
To start, we’re going to change the name of our root git branch from master to main. You can pick any name you want for the new branch, but I think main is clear and seems to be the evolving consensus for a new default.
Here’s the only command you need to change the master branch name:
$ git branch -m master mainThe -m argument moves the existing master branch into a new main branch, and keeps the entire git history for the old branch. It then removes the master branch for you. Simple, right?
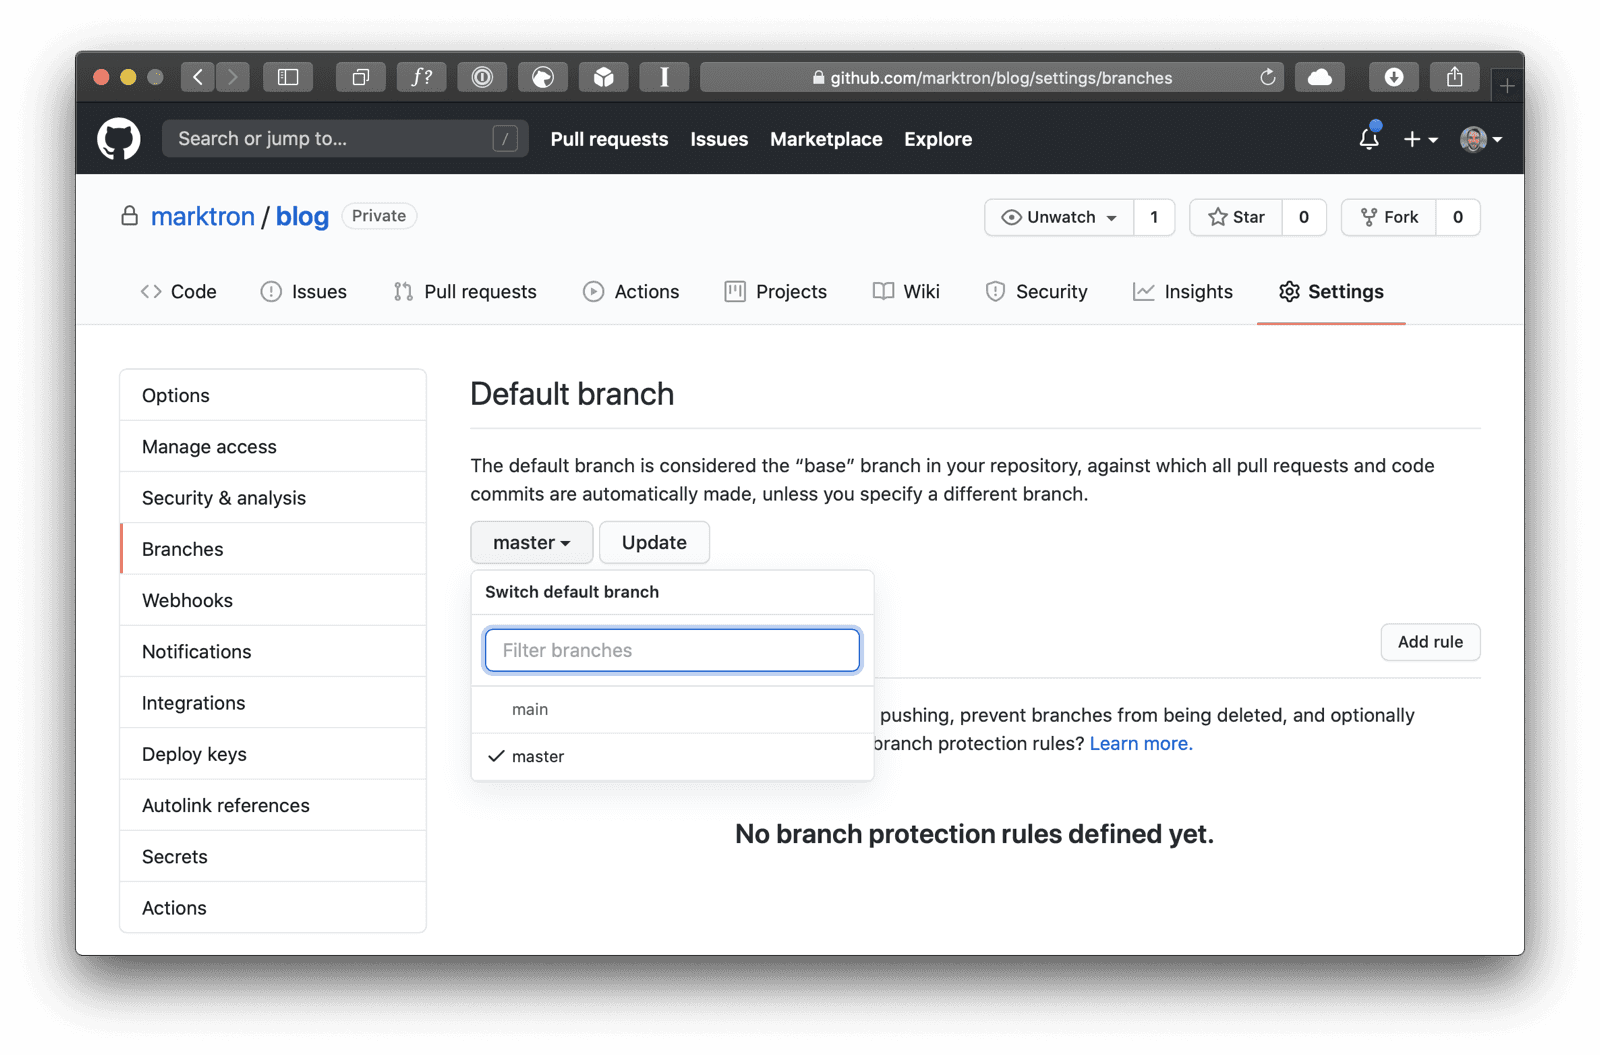
Updating your default branch on Github
If your repo is on Github (or Gitlab, Bitbucket, etc), you’ll want to make sure that’s updated as well. To begin, push your new main branch to Github just like you would with any branch:
$ git push -u origin mainNext, go to the repo’s settings page on Github and select the “Branches” tab. Under the “Default Branch” section, select main from the dropdown and click the “Update” button. Now Github will treat the main branch as your default branch.
Updating your default branch with other services
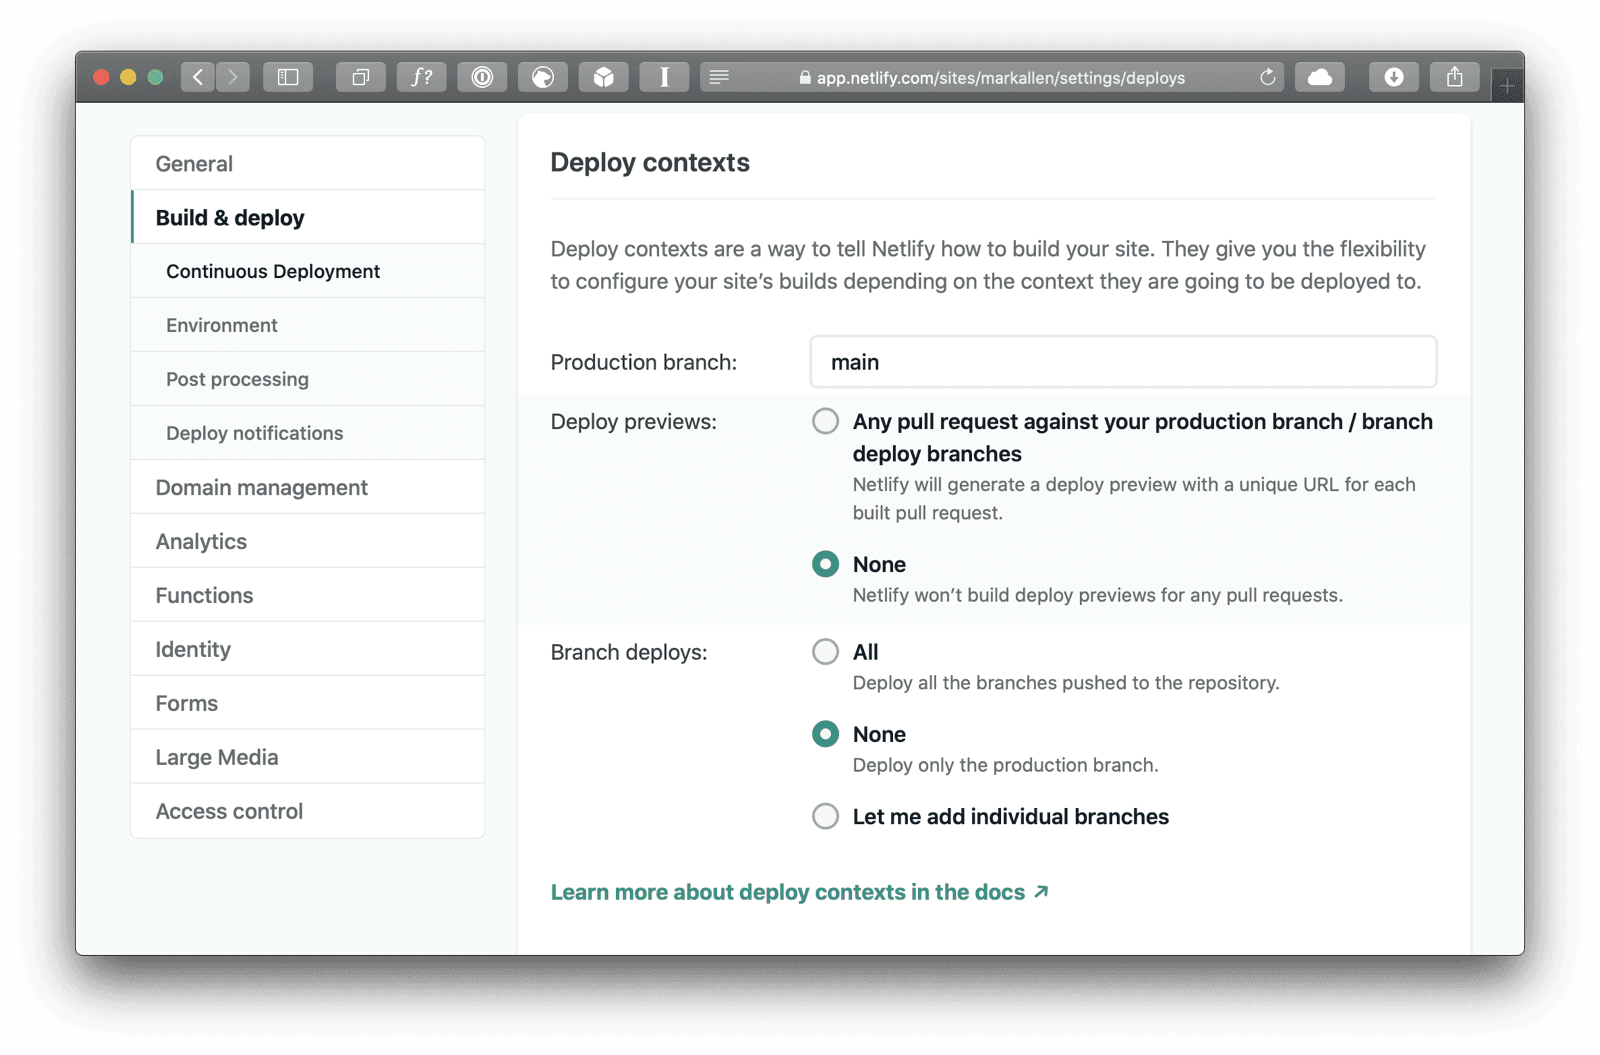
Many of my projects use Heroku or Netlify for hosting, and new builds are triggered when I publish updates to the main branch on Github. Every service I use now supports using non-master branches as the default. For Heroku, follow the instructions here.
For Netlfiy, go to your site settings, then navigate to Build & Deploy > Continuous Deployment > Deploy Contexts, where you can set the production branch.
Changing the default git behavior
So now you know how to convert an existing repository, but what about creating new ones? As of Git 2.28, you can set a configuration variable to define the default branch name:
$ git config --global init.defaultBranch mainTo change the default name with older versions of Git, check out this answer on Stack Overflow.
Working with complex repos and collaborators
I’ve only tested this on relatively simple git repos with only a few collaborators. For more involved setups, you will want to do some more research, but I probably don’t need to tell you that.
Finally, the most important step
We all need to do more to help make the world a more equitable place. If you are financially able, please consider making a donation to organizations such as the SPLC or Black Girls Code. ✌️

Written by Mark Allen, a product manager and designer currently based in Toronto. Say hello on Twitter.